Category Archives: Free Pattern

Sprung Hat Pattern

Do you have a lot of left over yarn? I do and I’m constantly weighing these little balls to see if I have enough of a certain color to make something. I mostly have left overs of the Knit Picks Palette line which is fingering weight 100% wool yarn. Sometimes I want to design a pattern that has lots of colors in it so I’ll pull from my collection of scraps. I have noticed in general that people are more likely to make my patterns if there’s just a few colors involved. However, I design for my own knitting pleasure and I can’t resist complex colorwork.

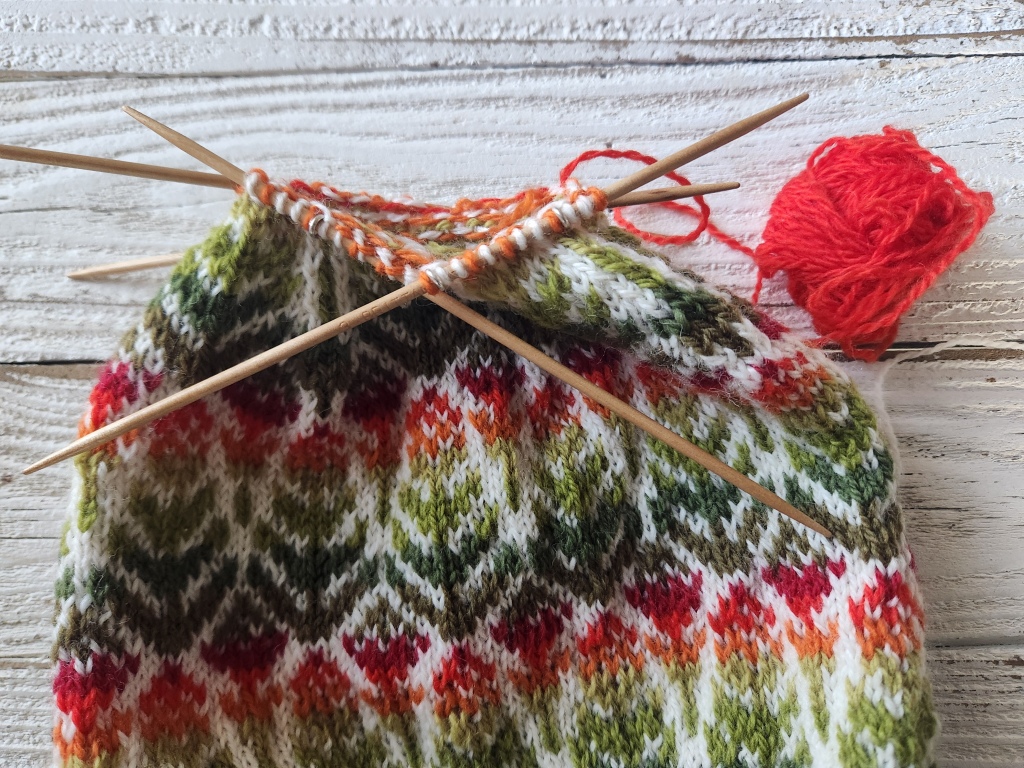
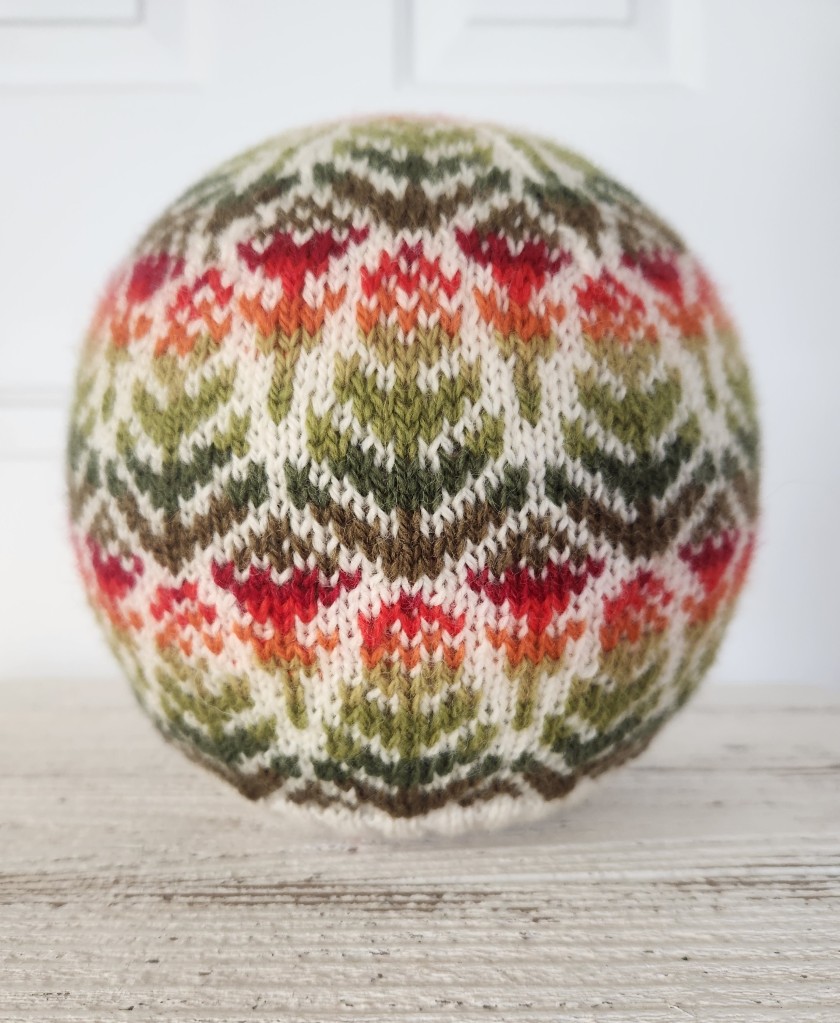
This photo shows how the Sprung Hat came about. The bottom swatch was make to figure out how the flowers would look. Then I got to work on the crown. (I normally don’t show my swatches. I do them quick and dirty with no concern about presentation!) I never intended to use pink in this hat but I was running out of orange and wanted to save it for the actual construction of the hat. Pink yarns would be a great substitute for the flower colors, if that is what you have. There are 9 colors here: 3 light back-ground colors, 3 greens for the leaves, and 3 flower colors. Of course the leaves don’t have to be green!

Here’s the FREE PATTERN for you to enjoy!

Please do not post this pdf on other websites! If you want to share it, just link to this page.

Alpinia Hat

My abundance of green colored yarns inspired my newest design: Alpinia Hat. This pattern calls for 8 colors: a main color for the ribbing and back ground, 4 greens for the stem/leaves, and 3 flower colors. I made the “blooms” with red and oranges but you could use any scrap colors you have around. For the bloom colors you only need 11 yards of 3 colors each. With the 4 green colors, you only need 20 yards of each. The flowers could be in pinks or yellows or lavenders–any colors really. When substituting colors, consider keeping the values/shades close to the original pattern.

This is a basic charted pattern using fingering weight yarn. Only 2 color strands are used at a time. There are lots of color changes though and if you make this hat you will enjoy it more if you know (or learn!) how to weave in ends as you go.

Here’s the free pattern for you to enjoy. If you make this hat, please share a photo of it with me or post it on Ravelry.

Please do not post this pdf on other websites! If you want to share it, just link to this page.

Foreign Accents Hat

There are many colors in my yarn collection that I consider “accent” colors. Yellow, orange, red, and bright peach are a few colors I rarely use. This time, however, I used them all at once. Except for the dark gray color, the rest of the palette for this hat is BRIGHT. This is how I came up with the hat I call Foreign Accents.

For me personally, this is the best fitting hat that I’ve made. I used smaller needles (size 2) for the corrugated ribbing which makes the hat fit nicely. I used my balloon trick for blocking: soak the hat, squish out the water, fit the hat over a balloon that measures 1 inch less in diameter than your head. Let it dry like that.

I’ve written up the pattern and I’m sharing it here for anyone who would like to make it. My advice for knitters using this pattern is to learn to weave in your color changes as you go. There’s lots of ways to do this and the internet is full of tutorials. I know we all have different techniques that accomplish the same task, that’s why it’s only a suggestion. Maybe there’s a person who LIKES to weave in all the ends at the end of a project, but that’s not me.

Please do not post this pdf on other websites! If you want to share it, just link to this page.

Here’s the FREE pattern for Foreign Accents Hat:

Desert Home Hat

A while back I went hiking in the Valley of Fire State Park here in Nevada. Afterwards I tried to pick out some yarn colors that reminded me of the unique rock that I had seen. I was looking on-line for a vibrant coral that leaned towards orange. The closest thing I could find was “Kumquat” by Knit Picks. I ordered it and when it arrived I wasn’t sure how to use such a bright color in my designs. So it sat in my basket for half a year.

During one of my crazy moments when I was sitting on the floor grouping balls of yarn into color combinations, I figured out what to do with “Kumquat”.

Mixed in with rust, yellow, brown, and turquoise, “Kumquat” found it’s home. From there I designed this beanie. I’ve written up the pattern to share. Here’s the Free Pattern for Desert Home Hat.

Please do not post this pdf on other websites! If you want to share it, just link to this page.

Rock Climbing Hat

You may know that I love wool and knitting but rock climbing is also at the top of my list. My local craig is Lime Kiln Canyon in Northern Arizona. I live in Nevada but I’m right on the boarder of Arizona and I’m a stone’s throw from Utah. We chose this place to live because it’s close to all our favorite rock climbing areas. We get really great weather here this time of year but if it’s a little cold a nice wool cap will make the hike up to the craig comfortable. But enough about climbing! Let’s talk knitting!

I designed these hats as a way to use up small amounts of yarn. Quick draws and ropes come in all kinds of bright colors so I thought it would be fun to put together a pattern that used up these tiny bright scraps. I used fingering weight 100% wool yarns by Knit Picks.

The first hat I made for myself and I used my favorite dark blue color as the base. After I made my husband a dark green hat I decided it was a slightly better color combination so I used his for the creation of the actual pattern that I wrote. Of course if you make this hat you can use any colors you like.

Here’s the Free Pattern for Rock Climbing Hat. Enjoy!

Please do not post this pdf on other websites! If you want to share it, just link to this page.

Pickleball Hat

My hobbies of knit pattern designing and pickleball have bumped into each other. I had wanted to make a pickleball hat for a while and this idea finally came into my head. The challenge was the color yellow. I’m not a big fan of bright yellow so I had to work in other colors that I do like.

I wrote up the pattern and I’m posting it here for free. If you make it please send me a photo or post on Ravelry. Enjoy!

Please do not post this pdf on other websites! If you want to share it, just link to this page.

Joy

It may seem strange that I’d call these dark moody mittens “Joy” but I love deep dark colors. I’m quite happy with a lap full yarn and 5 little sticks (and a cup of strong coffee). Making these brought me joy.

Like the last few mittens that I’ve designed, I used the most simple seeding pattern for the palms and thumbs–alternating one light stitch and one dark stitch throughout.

Although the pattern has only 2 colors per row, it does change colors enough that it might be wise to weave in the ends as you go. This is how I knit and I know that it makes the yardage count on the low end. If you knit with the technique of weaving in all the tails of the color changes at the end of the project you will need the amount that is in the upper end of the range. For example, if the pattern says “Seude (CC2) 33-37 yards”, you’d want to err on the side of the greater amount if you leave tails as you knit. That being said, I think it’s worth learning how to weave in ends as you go. Using that technique will allow you to use less yarn, not have to manage all the strings as you go, and in the end not have so much work to do to finish the project.

Here’s the Free Pattern for Joy Mittens. Enjoy!

Please do not post this pdf on other websites! If you want to share it, just link to this page.

Temptation Mittens

How many different colors do I want to put into a design? Often I make mittens (or hats or socks) with just 2 colors. It’s quite fun to just knit along not having to change colors as I go. Sometimes I do want the kind of patterns that involve multiple colors. That’s how I came up with Temptation Mittens. With 3 dark shades and 2 light shades, these mittens kept me entertained. I chose colors that I don’t usually see together. I used fingering weight yarns from the Knit Picks Palette line. They are called Caper, Ash, Silver, Lichen and Hazelnut.

I use to think that the palms of the mittens needed to be fancy but after making lots of mittens I started appreciating this really plain type of seeding stitch. It’s made by alternating light and dark using what ever strands you were working with on the front of the mitten. My pattern has this charted out for you but once you get the system down you don’t really need to look at the pattern when knitting the palms.

Here’s the Free Pattern for Temptation Mittens.

Please do not post this pdf on other websites! If you want to share it, just link to this page.

Charmed Mittens

Third time’s a charm. After two other attempts of making mittens with this motif I finally got the colors how I wanted. This fair isle style pattern works with 2 colors at a time. The palms and thumbs are a simple seeding pattern of alternating light and dark. The cuffs are quite long and tight. They are so warm!

These were made with Knit Picks Palette line of yarns. Everything I’ve been making lately is with this yarn because I love it so much. The colors are amazing and the quality and price are great. You could substitute other fingering weight wool. If you are using bits of what you have around, you will need 3 dark shades and 2 light shades to get the contrast right.

Below is the pattern that you can download for free. Let me know if you make them–post on Ravelry or send me a message. Happy knitting!

Please do not post this pdf on other websites! If you want to share it, just link to this page.

Star Lit Mitts

I’m putting out back to back patterns this weekend. Yesterday I posted Star Power Mitts and today I’m posting Star Lit Mitts. They are both fingerless mitts with a star pattern. The thumbs are similar and they both have a corrugated ribbing. The colors make them different. The Star Lit Mitts were going to be Star “Light” –but that name was already taken. Plus, I like the rhyming nature of a Star Lit Mitt.

If you knit these mitts or any other of my patterns, please post on Ravelry or if that’s not your thing, send me a message with a photo. I’d love to see your work! I’m giving away the pattern for free. Enjoy!

Please do not post this pdf on other websites! If you want to share it, just link to this page.